
Hello there again :)
I am wayyyy behind on blogging about my last Creative Team article for Scrapbooking Memories.
I have been planning to do this post for a very long time...but time has got the better of me & it just hasn't happened...until now!
The article is from before Christmas...and hence the reason I decided to do something a bit different...and something Christmas related.
I decided to do my article as a step x step for 2 Christmas projects, that could be used to decorate your home for the festive season....and they are both fairly simple, so don't be put off thinking they look too hard...and besides, I promise they will be a lot of fun for those who'd like to give it a try.
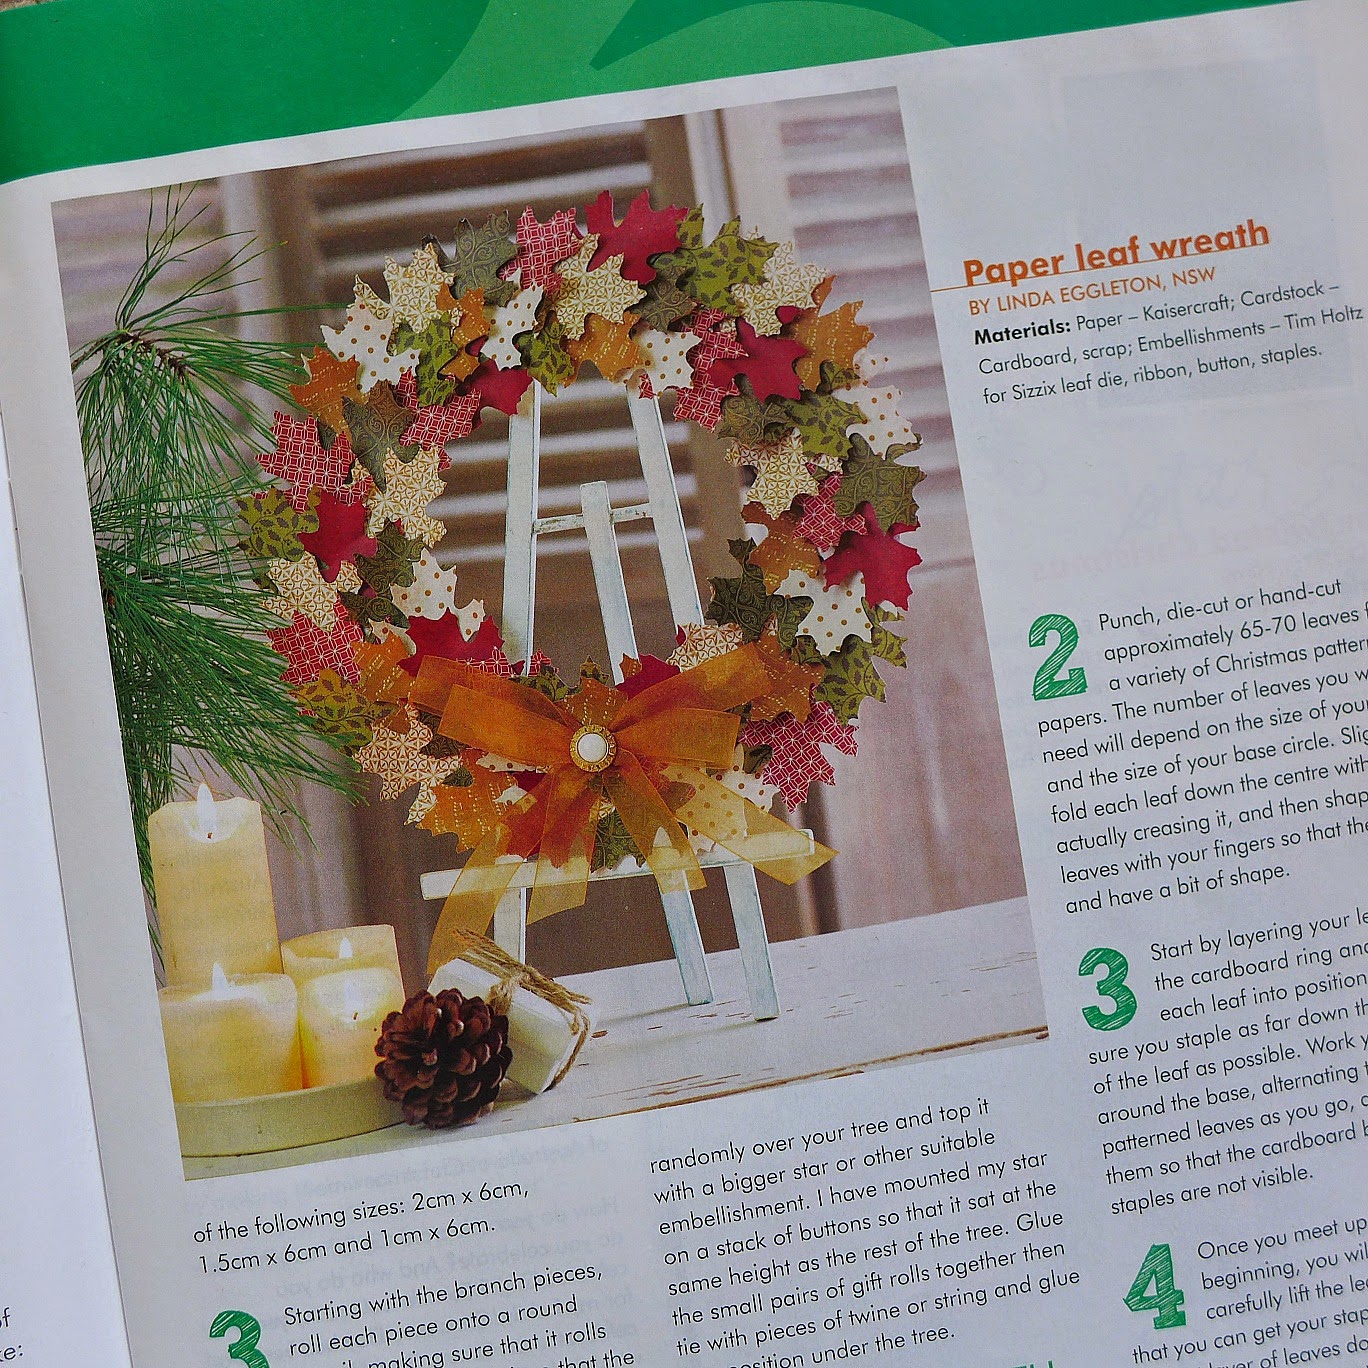
First up is a Paper leaf wreath.

To cut a long story short....you basically punch/die-cut or hand cut a heap of leaves from a variety of Christmas patterned papers. Then staple them to a donut shaped piece of cardboard that can be cut from any old cardboard you have on hand....making sure to overlap the leaves to give the wreath a bit of fullness & make sure that none of your staples are visible.
Once you've completed all the way around the circle, finish it off with a nicely tied bow....and then add another donut shaped piece of cardboard to the back, to cover up all the staples....and add a loop of ribbon or such, that can be used to hang the wreath.
And that is just about it....you will now have yourself a lovely handmade Christmas wreath :)))
Here's a few close ups....

It's a good idea to also shape the leaves a bit, so that they don't sit flat on the wreath.

Mix the colours & patterns up so that you don't have a clump of all the one
colour/pattern in the one spot!

I tied a nice double bow in a gold ribbon ...and finished it off with a vintage style button
that I had in my stash :)
Next is a Christmas canvas....

First prep your canvas & add any textured/stencil work if you wish.
Again, choose a variety of Christmas patterned papers.
Cut them so that each piece is approximately 1cm shorter or longer than the other (depending if you're starting with the top or bottom section of the tree....and each one around 6cm in length - this is the length that will get rolled up. You'll also need a few shorter pieces that will form the trunk & little presents under the tree.
Using a round pencil, roll each piece up on the pencil.....along the 6cm side.
Arrange them on the canvas so that they form the shape of a triangle....which will be the branches of the tree. Once happy with the positioning, glue each piece down with a really strong glue.
Finish off by embellising with buttons, twine....or anything else you
might have that would be suitable.
Here's a few close ups....

I made the little presents different sizes & tied some twine into a bow around some of them to help them look more like little gifts.

Buttons are great for adding as little decorations to the tree

I added a star to the top
And used some little alpha stickers to add the "Merry Christmas"

My photographing of these projects is fairly plain & ordinary, so I thought I'd also add some photos I took of the photos in the magazine....and you'll see just how well the projects
were styled up to be photographed.
I think they look awesome!! :)))) I was so happy when I seen them in the magazine....very professional indeed!

I absolutely LOVE how this one was done <3

And the canvas looked pretty fantastic too!

Well there you have it....my last article....finally!!! (and soon Easter will be here!) lol
I hope you found the projects interesting & inspiring....thanks for taking the time to check them out.
Until next time....xx
4 comments:
Yes I did see these in the mag and they looked really lovely... fabulous Christmqas decorations.. beautiful creating!
Wowzers! You are a creative genius my friend!! I LOVE the Christmas tree canvas - I think that is a pretty fool-proof project for a class of non-experienced scrappers to have fun & create something they can be really proud of. Awesome ideas & they look so beautiful in the magazine!!
Love both of these projects. The wreath looks lovely and that canvas is just lovely. I need to do this for next Christmas...
Wow!!! These are gorgeous Linda! Awesome deco items with clear and precise instructions ... absolutely brilliant!! Sorry I haven't been here for a while but life is pretty hectic at the moment but I'm so glad I saw this before it disappeared off the radar!! Stunning as always!! ox
Post a Comment